
← All projects · Build guide
Build a Temperature-Controlled Clay Warmer for Under £60
What this is
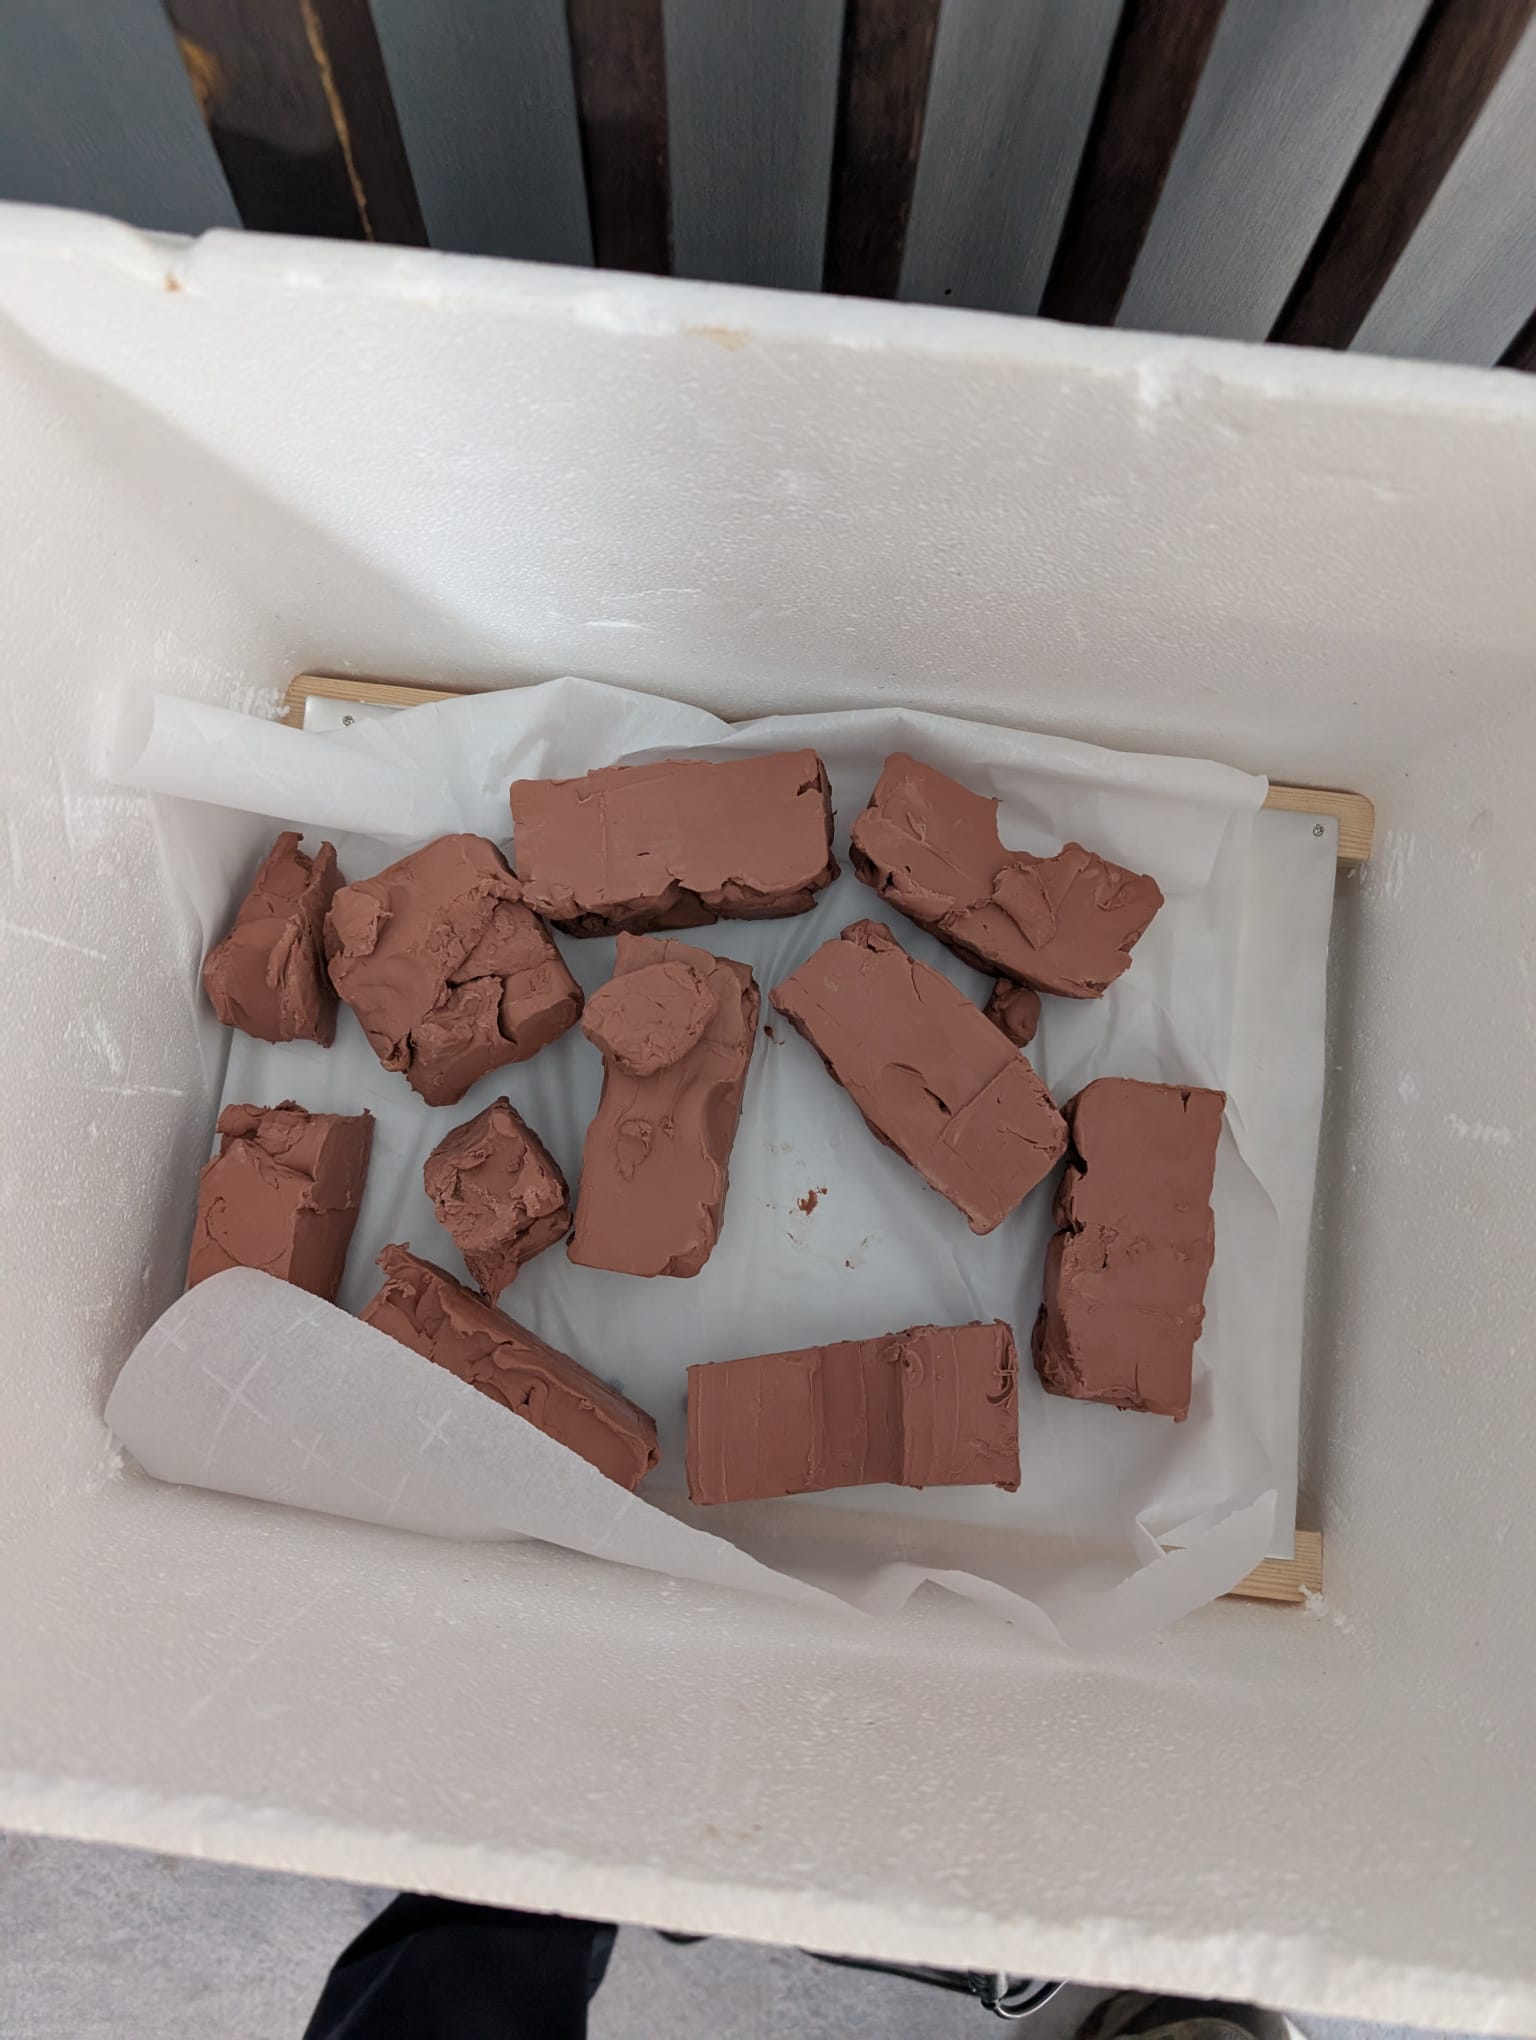
Oil-based modelling clay — the sulfur-free stuff sculptors use for mould-making — is stiff and unworkable below about 35°C. Warm it and it becomes pliable enough to cut, press and burnish to a clean surface.
The usual advice is a microwave. It's bad advice. Clay conducts heat poorly, so a microwave gives you molten pockets inside a block that's still hard on the outside, and some formulations smoke. A heat gun works but needs constant attention.
What you actually want is a box that holds the whole block at a set temperature for as long as you like. We couldn't find one made in the UK, and the imported options we did find were built for American 110V mains and big 20lb blocks, with shipping and duty on top. So we built one — the most affordable option, using things we mostly already had.
Total cost: about £40 the way we built it, scavenging the box, plate and timber — under £30 with a spare power supply or USB-C charger — or about £60 buying everything new. Build time: an afternoon.
It holds 45°C indefinitely, warms four pounds of clay through in about an hour, and cannot run away and set fire to anything.
It's not just for clay. The same box at a different setpoint is a filament dryer, a bread proofer, a resin curing box, or a warming cabinet for anything that wants a steady low temperature. If you're here for one of those, skip to the Adapting it section at the end.
⚠️ Safety: Build and use this at your own risk. It's a heater designed to run unattended, so follow the safety steps — the thermal cutout, the probe on the plate, and mains kept outside the box — and don't skip the testing section. Use a UKCA- or CE-marked 12V power supply from a reputable seller, not an unbranded one. If you're not confident with wiring, build it with someone who is.
How it works
Three parts, conceptually:
- An insulated box that keeps the heat in.
- A heater and a metal plate — the plate spreads the heat so the clay warms evenly instead of scorching in stripes.
- A thermostat that switches the heater on and off to hold a set temperature, plus a mechanical cutout that breaks the circuit if the thermostat fails.
Everything inside the box runs at 12V. Mains stays outside in a sealed power brick. That's deliberate — it means there is no shock hazard inside an enclosure you'll be reaching into, and no mains wiring inside foam insulation.
Parts list
The box
| Item | Cost | Notes |
|---|---|---|
| Polystyrene box | Free | We used a vegetable box |
Use a polystyrene shipping box. Ours is a vegetable box. Fish counters, meat-box deliveries, veg boxes, and pharmacy or vet cold-chain deliveries all come in thick EPS boxes that get binned by the stack. Ask. They're typically 25–30mm walls, which is plenty.
Want better insulation? Line a plastic storage crate with 25–40mm PIR board (Celotex, Kingspan) — roughly twice as good per inch as polystyrene. We didn't need to.
Don't bother with: a Milwaukee PACKOUT cooler (£120 for insulation you can get free), or a soft cooler (fabric walls, no).
The electrics
| Item | Cost | Notes |
|---|---|---|
| 12V power supply, 5A/60W | £0–12 | Barrel-jack "brick". Check you don't already have one. |
| 12V silicone heater pad, 40–50W | £10–15 | Search "12V silicone rubber heating pad". ~100 × 200mm. |
| W1209 thermostat module | £5 | Comes with its temperature probe. |
| KSD9700 thermal cutout, 70°C, normally closed | £3 | The safety part. Don't skip it. |
| Aluminium sheet, 2mm | £0–10 | ~250 × 150mm. We used an offcut. Steel works too — see notes. |
| 15mm square timber | £0–3 | Offcuts, to hold the plate off the box floor. |
| Screws, 10mm | £5 | Fix the plate to the timber. |
| Aluminium foil tape | £5 | Also holds the heater pad on. |
| Baking parchment | — | Laid over the plate to keep clay off the aluminium. |
On wire: we didn't buy any. The heater pad's leads were long enough, and we cut a short piece off one of them for the one extra link the wiring needs.
On the power supply: a 50W pad draws about 4.2A at 12V, so a 5A brick runs at 85% of capacity. It'll get warm. A 6A or 8A brick is better if the price is similar. Don't plug anything else into it.
USB-C alternative: if you have a USB-C PD charger, a £5 "PD trigger board" will give you 12V from it and save buying a brick. Two caveats — 12V is an optional PD voltage and many chargers don't offer it, and PD caps at 3A without an e-marked cable, so you'd get ~36W instead of 50W. Warm-up is slower; holding temperature is unaffected. Do not run a 12V pad at 15V or 20V to get more power. Power goes as the square of voltage, so a 12V 50W pad at 20V dissipates about 139W and will destroy itself.
On the plate: we used a 2mm aluminium offcut and saw no hot bands — the clay warmed evenly. We lay baking parchment over it so the clay never touches the metal, which keeps the plate clean. Thicker plate spreads heat more evenly still if you have it. Aluminium conducts at ~205 W/m·K, mild steel at ~50, so steel spreads heat about a quarter as well: if you use steel, go thicker (6mm steel is roughly equivalent to 3mm aluminium), or you may see hot bands over the heater traces. Clean any oil or mill scale off before use, and if it's not stainless, put foil or parchment between it and the clay.
The physics, briefly
Worth understanding so you can adapt the design rather than just copying it.
Heat loss. A 15–20 litre box has roughly 0.37 m² of surface. 25mm of PIR gives about 1 W/m²·K, so the box leaks around 0.37 watts per degree of difference between inside and outside. At 45°C inside and 15°C in the workshop, that's a 30°C differential and about 11 watts of standing loss.
A 50W heater covers that with room to spare, and the surplus is what gets you up to temperature quickly. Polystyrene is about half as good as PIR, so figure 20–25W — still comfortably within budget. This is why insulation quality barely matters when you're on mains: you have watts to burn.
Warm-up time. Oil clay's thermal diffusivity is around 6.5 × 10⁻⁸ m²/s — very low. Warm-through time scales with the square of half-thickness, which means thickness dominates everything:
| Clay thickness | Time to warm through |
|---|---|
| ½ inch | 10–12 minutes |
| 1 inch | 35–45 minutes |
| Whole 4lb block (~2 inches) | 2–3 hours |
Slice the block before you start. It's the single highest-leverage thing you can do. And keep the slices separated — four slices pressed together conduct as one lump four times as thick, which is sixteen times the warm-up time.
Plate mass is negligible by comparison. A 250 × 150 × 2mm aluminium plate is about 200g, needing roughly 4.5 kJ to go from 20°C to 45°C — under two minutes at 50W.
Building it
1. Prepare the box
A polystyrene shipping box is ready as it is — the moulded faces are already sealed.
If you've gone for a PIR-lined crate instead, tape every cut edge with aluminium foil tape: cut PIR sheds crumbs you don't want in your clay.
Don't use solvent-based contact adhesive anywhere near polystyrene — it dissolves it.
Drill or cut one hole through a side wall near the top for the wires. Nothing above 12V passes through it, so it needs no gland or seal; a cable tie either side gives you strain relief.
2. Mount the heater to the plate
We used aluminium foil tape. Lay the pad on the underside of the plate and tape over it, pressing the tape down firmly onto the plate around all four edges. Cheap, handles the temperature, repositionable — the easy answer.
Air pockets under the pad are hot spots — the pad can only shed heat where it touches metal, and a void behind it will overheat and can burn the element out. Press it flat across the whole area.
Other options:
- The pad's own adhesive. Many silicone pads have a 3M backing. Clean the aluminium with isopropyl alcohol, peel, and press firmly.
- High-temperature RTV silicone (the red engine-gasket type), thin smear, weighted while it cures. Best bond.
- Mechanical clamping — two thin metal strips across the pad, screwed to the plate at the edges. Best thermal contact, nothing to degrade.
Do not use hot glue. Standard EVA softens at 60–80°C, barely above your operating temperature, and the pad's own surface runs hotter than the plate. It will creep and let go. It's also a thermal insulator sitting exactly where you need contact.
⚠️ If you also work with platinum-cure silicone (Dragon Skin, Mold Star, anything addition-cure): most cheap RTV is acetoxy tin-cure — the kind that smells of vinegar — and it is a reliable inhibitor of platinum silicone. Uncured RTV on your hands, tools or bench will give you a tacky, ruined mould surface. Do the RTV work well away from any silicone pour, let it cure for several days, and wash thoroughly. Or just use the tape.
3. Stand the plate off the floor
We made a frame from 15mm square timber offcuts — two long rails with crosspieces, roughly a double H, simply because that's what fitted. The exact shape doesn't matter; it just needs to hold the plate level, 15mm off the floor, with the heater pad underneath.
Screw the plate down onto the frame with short (10mm) screws in the far corners. The clay doesn't sit there — and if it did, it wouldn't matter much.
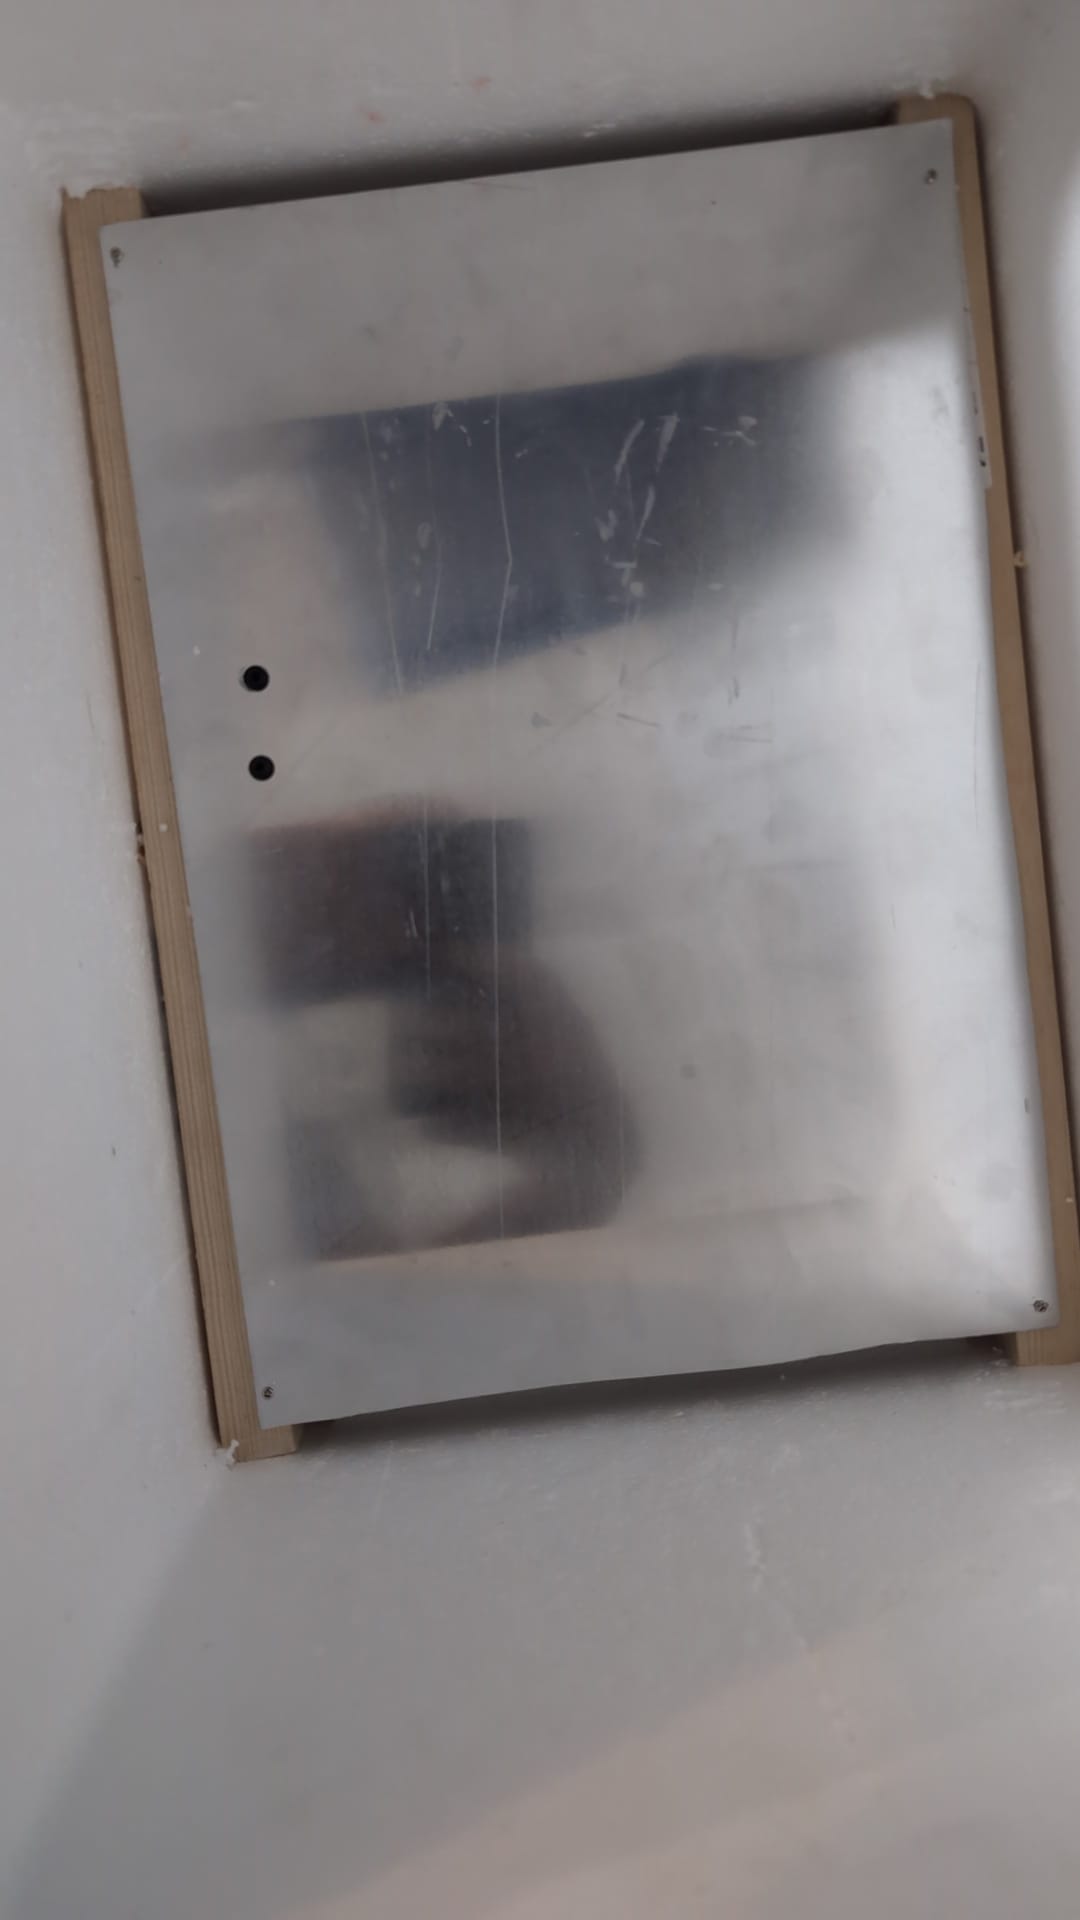 Our 2mm plate on its timber frame, with a screw in each far corner.
Never let the heater or plate rest directly on the foam. EPS softens around 80–90°C. At 45°C you have good margin, but a fault condition doesn't.
4. Wire it up
This is the part people find confusing, so read it twice.
The W1209 has four screw terminals: GND, +12V, K1, K0.
- GND and +12V power the board — the display, the microcontroller, the relay coil.
- K0 and K1 are the relay contacts. They are a switch and nothing else. No power comes out of them. The board closes and opens them for you.
So 12V from the brick splits and goes to two places on each side:
| From the brick | Goes to |
|---|---|
| Positive | +12V terminal (powers the board) and K1 (feeds the switch) |
| Negative | GND terminal and the far end of the heater pad |
And the heater circuit runs: brick positive → K1 → [relay] → K0 → thermal cutout → heater pad → brick negative.
K0 and K1 are interchangeable — there's no polarity on a switch. The heater pad has no polarity either; it's a resistor.
The probe plugs into the white JST connector, not the screw terminals. Without it the display shows dashes and nothing works.
Check your brick's polarity with a multimeter before connecting anything. Red is conventionally positive but don't rely on it — reversing polarity will kill the W1209. Set the meter to DC volts (the 20V range), probe the two output wires, and confirm you get +12V with red on the wire you think is positive.
⚠️ Multimeter warning: make sure the red probe is in the VΩmA socket and the dial is clicked firmly onto a DC volts range. In current mode a multimeter is nearly a dead short between its probes — touch it across a supply and you'll get a spark and a blown fuse. On many cheap meters the 10A socket is unfused, so there's nothing to blow and nothing to warn you.
5. Position the probe and the cutout
Both go on the top face of the aluminium plate, under the clay. Tape or clamp the probe; bond the cutout with thermal adhesive or screw it down.
This matters. The probe controls the surface the clay actually touches. A probe dangling in the air reads the air, which lags the plate, which means the plate overshoots. The cutout has to sense the plate for the same reason — floating in the box it'll trip late or never.
6. Set the thermostat
Buttons left to right on the silkscreen: −, +, SET.
Setpoint: short press SET. The display flashes the target. Use + and − to reach 45, press SET to confirm.
Parameters: hold SET for about five seconds until P0 appears. Then + and − step through P0–P6, SET enters one to edit, + and − change the value, SET confirms.
| Parameter | Set to | What it is |
|---|---|---|
| P0 | H | Heating mode (not cooling) |
| P1 | 2 | Hysteresis in °C — how far it drops before switching back on |
| P2, P3 | leave | Setpoint adjustment limits |
| P4 | leave | Calibration offset |
| P5 | leave | Start delay |
| P6 | leave | High-temperature alarm |
Hysteresis of 2°C is right. Tighter and the relay chatters, shortening its life.
The clone boards vary slightly in their button sequences. If a short press doesn't bring up the setpoint, try holding it.
Testing before you trust it
Do these in order. Each one catches a different failure.
Power up with the probe connected, nothing on the relay. The display should show room temperature. Cup the probe in your hand — the number should climb within a few seconds.
Check continuity through the cutout with the meter, at room temperature. It should beep. A cutout that arrived open, or a cold solder joint, gives you a heater that simply never comes on — and you'll waste an hour blaming the thermostat.
Check the relay switches. With the setpoint at 45 and the probe at room temperature, the board should be calling for heat: you should hear the relay click and measure 12V at K0. Warm the probe past 45°C and it should click off and K0 drop to zero.
First heat-up run with the lid ajar. Watch the display climb and level off. Put a finger on the plate — if the plate feels much hotter than the display says, the probe isn't properly contacted. Fix that before you close the lid.
Using it
Set 45°C. Slice the clay into 1-inch slabs, lay them flat on parchment on the plate with gaps between them, close the lid, and leave it an hour.
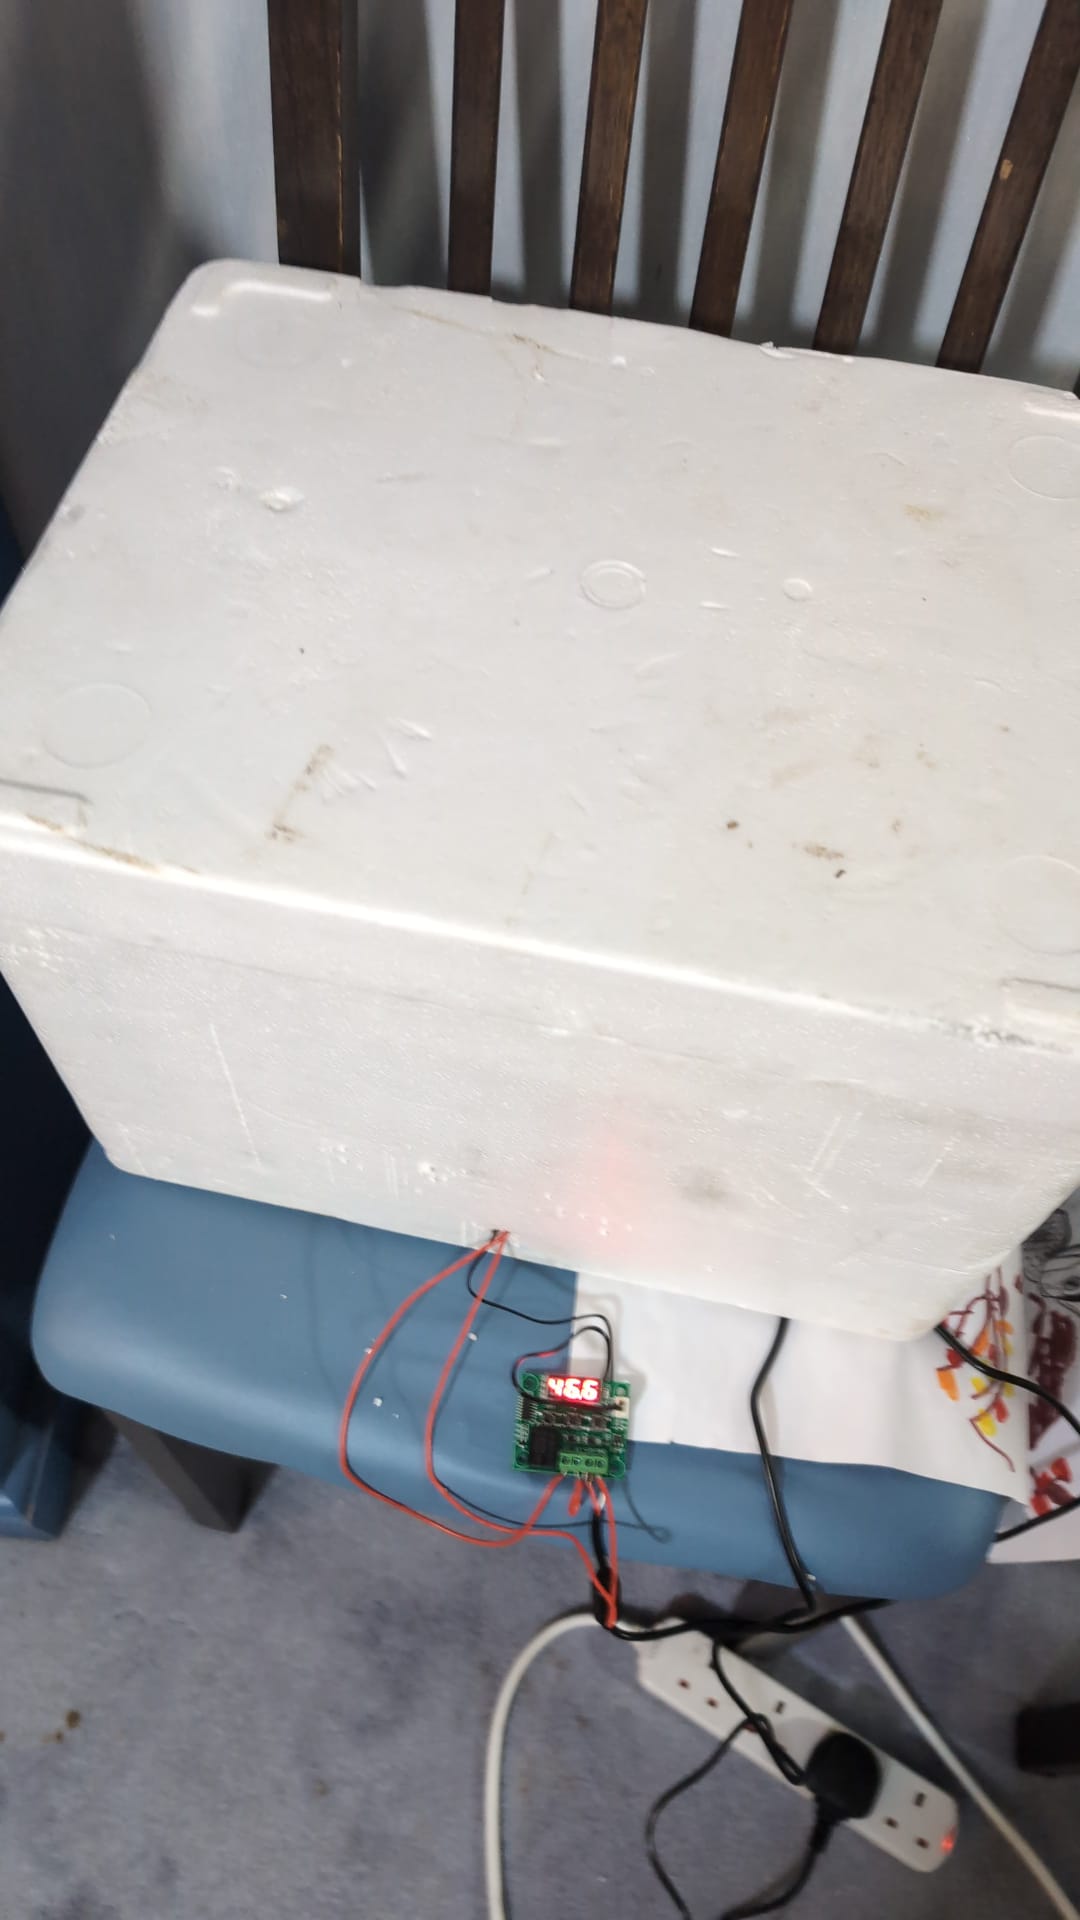 Lid on and warming. The W1209 sits outside the box; only the 12V wires go through the wall.
Don't exceed 55°C. Above that, sulfur-free clays sag under their own weight and the oil and wax phases begin to separate, leaving you with a greasy, unusable block. 45°C is soft enough to press and cut, firm enough to burnish a crisp surface. If it comes out too soft to hold an edge, drop to 40°C rather than working it cold.
Store clay in slabs with parchment between layers, in a lidded tub, somewhere cool. It doesn't dry out — you're protecting it from dust, grit and sawdust, all of which print straight into whatever you're making.
Adapting it
The box doesn't know what's in it. Change the setpoint and it's a different tool:
| Use | Setpoint | Notes |
|---|---|---|
| Oil clay | 45°C | As above |
| Filament drying (PLA) | 45–50°C | Leave the lid slightly ajar so moisture escapes |
| Filament drying (PETG, nylon) | 55–70°C | Check your foam's temperature rating first |
| Bread proofing | 27–32°C | |
| Resin curing | 40–60°C | Check the resin's datasheet |
| Yoghurt | 43°C |
Above about 60°C, reconsider the enclosure — EPS softens around 80–90°C and you want margin. Above 70°C the thermal cutout will trip, so you'd need a higher-rated one; they're sold in steps up to 150°C or so.
Bill of materials summary
| What we spent | Buying everything new | |
|---|---|---|
| Polystyrene box | Free (veg box) | Free (ask) |
| Power supply | £12 (new brick) | £12 |
| Heater pad | £12 | £15 |
| W1209 + probe | £5 | £5 |
| Thermal cutout | £3 | £3 |
| Aluminium sheet, 2mm | Free (offcut) | £10 |
| Timber for the frame | Free (offcuts) | £3 |
| Screws and foil tape | £8 | £10 |
| Total | about £40 | about £60 |
In hindsight we'd have skipped buying the brick: use an old one, or fit a USB-C PD trigger board and run it off a USB-C charger (see the power supply notes above). That brings our build to about £28.
A note on what this cost to work out
This design came out of a mould-making project at home — bedding a knife in clay for a two-part silicone mould, and getting fed up with clay that was rock-hard at one end of the block and slumping at the other.
Most of the build is obvious in hindsight. The parts that weren't: putting the probe on the plate rather than in the air, the independent thermal cutout, and keeping mains outside the box entirely. Those three are why this is a thing you can leave running unattended rather than a heater in a foam box.
We're 3D printing a case for the thermostat board next, and we'll add it here when it's done.
If you build one, come and show us. If you'd rather build things like this with other people, that's what we're working towards in Crawley — keep posted.